Add notifications to a Node app (app inbox, SMS, and email)
Notifications can be a huge value add to your app users, but if you get them wrong, they're hugely annoying. Learn how to add smart app notifications in this tutorial.
Configure Courier for your app
First, log in or create an account at courier.com
On the dashboard, at the bottom of the left-hand sidebar, there’s a toggle that lets you choose either test or production data. For this tutorial, we’ll work with test data.
Our first step is to add the notification channels we want our app to support. Courier has built-in integrations with dozens of tools, plus ways to add your own with webhooks and SDKs.
This tutorial will set up in-app notifications, email, and SMS.
Add support for in-app notifications
A notification inbox in an app is a great way to unobtrusively let users know what’s happening. Courier provides everything you need to add one, including React components (which we’ll look at later in this tutorial).
To set it up, go to your channels and choose Courier under the Inbox section. On the next screen, scroll all the way down and click “install provider”.
Head back to your channels and it’ll show up under your configured providers as well as in your routing settings.

Add support for SMS and email
To send notifications to users who aren’t actively viewing your app dashboard, you’ll need additional channels.
First, add email by choosing Gmail from the Email providers and authorizing with any of your Gmail accounts. (If you don’t have one, you can skip this or use a different provider.)
Next, add SMS using Twilio. You’ll need your account SID and auth token, which are available at on your Twilio console home page, and any active Twilio phone number on your account.
Once this is done, both email and SMS will be available under configured providers.
Add channels to your default routing
Courier allows you to choose whether a given channel should always be notified, or if only the best available option out of a set of channels should be used.
This is a great way to allow you to reach your users without being too overbearing about it. No one likes to get the same notification duplicated across every account and device they own.

How this works in practice is that Courier will always deliver a notification to the in-app inbox, and will choose one of either SMS or email, using SMS first if both are available. These are only defaults, though — you can also allow your users to choose which platforms they want to get notified on, and if they want an alert on every device and account they have, you can make that happen!
Set up the app for local development
For this tutorial, the app we’re working with is a React-powered app dashboard. The dashboard itself doesn’t do anything — it’s only there so we have a plausible app to work with.
Under the hood, this demo uses a couple things to make our lives easier with setup:
- Notifications themselves are managed by Courier. We’ll spend most of this tutorial on how to configure, display, and send notifications in a React app.
- User auth is handled by Clerk. Having a logged-in user is important because it means we have a unique ID for each person viewing the dashboard, which allows Courier to route notifications to people properly.
- This app uses a webhook to sync users between Clerk and Courier. The webhook will be built on Netlify Functions both so we don’t have to think about how to deploy a server and also because we get a way to expose our local dev environment as a live URL for testing.
- To send notifications, we’ll use a Netlify Function to keep secret credentials secure.
To grab the tutorial repo at the starting point, clone the start branch:
# clone the start branch of the repo using the GitHub CLI (https://cli.github.com)gh repo clone learnwithjason/courier-notifications -- -b start
# move into the foldercd courier-notifications/
# install dependenciesnpm i
Get Clerk credentials
To use the auth, you’ll need a free Clerk account. This will take less than five minutes to set up.
- Log in or create an account at clerk.com
- Create a new app and choose any auth provider that you want to use to log in with — this tutorial uses GitHub
- Go to API Keys in the left-hand nav
- Copy your publishable key and your secret key
In your code, rename .env.EXAMPLE to .env and add your publishable key as VITE_CLERK_PUBLISHABLE_KEY and your secret key as CLERK_SECRET_KEY.
Start the dev server
With the credentials saved, you’re able to start the app and log in.
# start the dev servernpm run devOpen http://localhost:5173 in your browser and you’ll be redirected to the login page

Use your GitHub account to log in and you’ll see the dashboard.

Now that we’re able to log in, we want to add a notifications inbox up in the right side of the header next to our user info.
Display notifications in the app
To add a notifications inbox to our app, we’ll take advantage of Courier’s ready-made React components.
Get your Courier credentials
First, we need our client key from Courier. To find this, head to the settings for your Courier inbox channel, scroll down to the “Test Configuration” section, and copy the “Client Key (Public)“. Add it to your .env file as the value of VITE_COURIER_CLIENT_KEY.
Install Courier npm packages
The demo repo already has dependencies installed. For posterity, you can install everything you need to run Courier notifications in a React app by installing these npm packages:
npm i @trycourier/courier @trycourier/react-inbox @trycourier/react-providerCreate a Notifications component
In your code, create a new file at src/components/notifications.tsx and add the following code inside:
import { CourierProvider } from '@trycourier/react-provider';import { Inbox } from '@trycourier/react-inbox';import { useUser } from '@clerk/clerk-react';
export function Notifications() { const { user } = useUser();
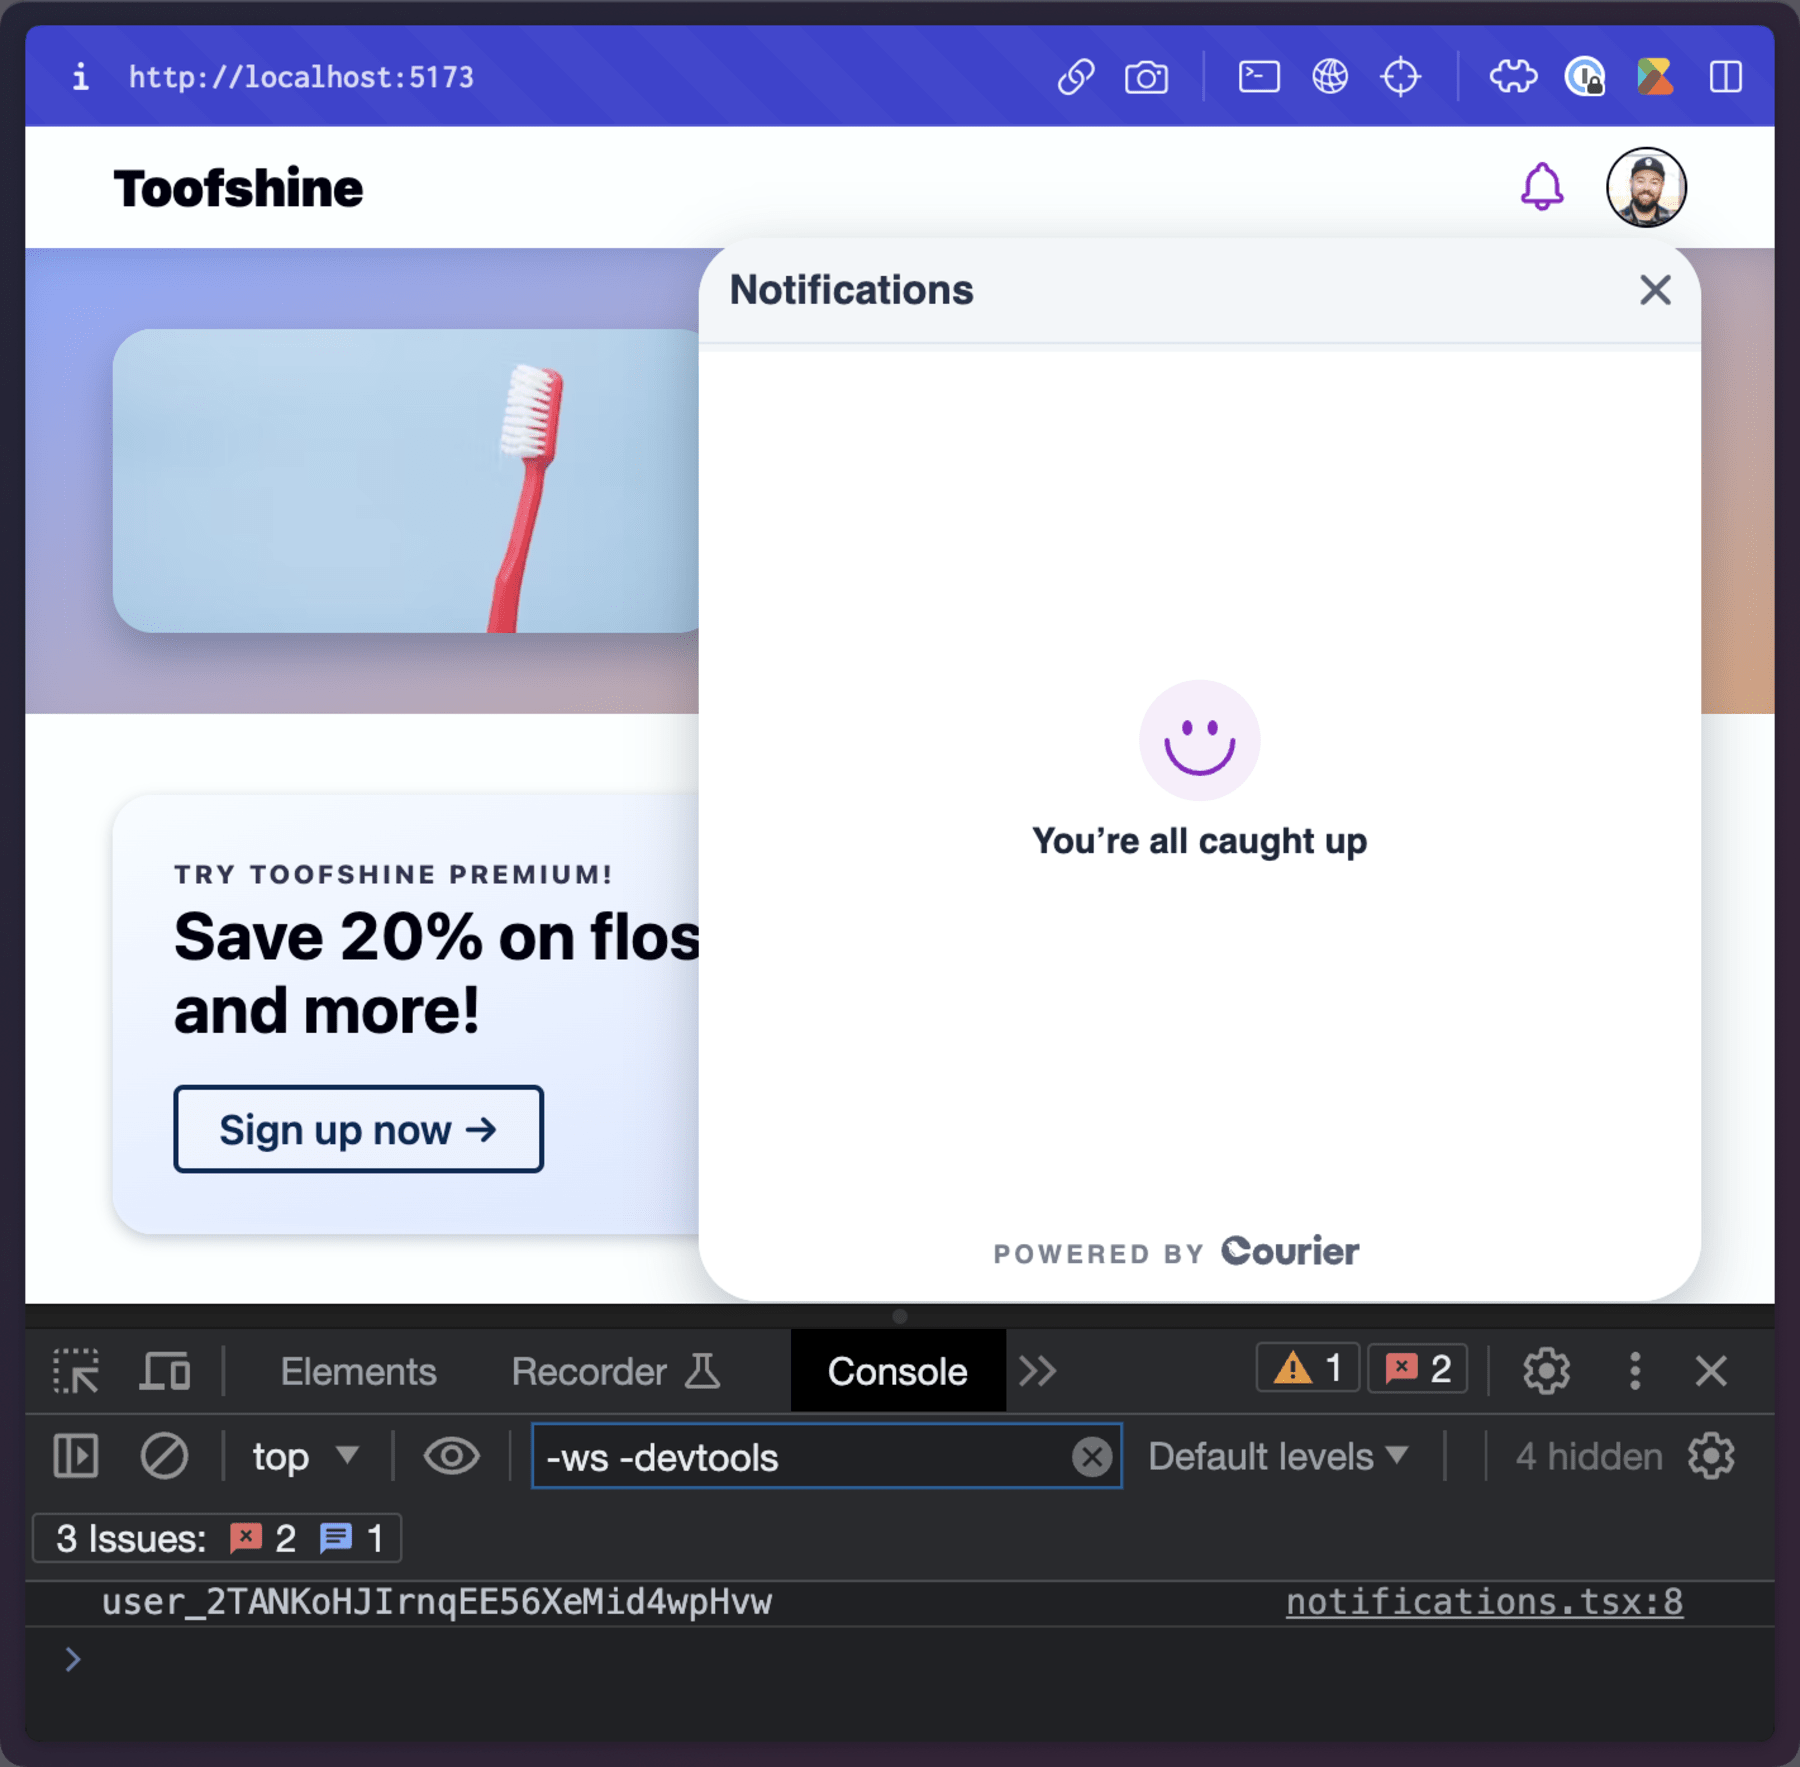
console.log(user?.id);
return ( <CourierProvider userId={user?.id} clientKey={import.meta.env.VITE_COURIER_CLIENT_KEY} > <div className="notifications-wrapper"> <Inbox /> </div> </CourierProvider> );}This component places the Inbox component inside a CourierProvider that receives the client key from Courier and the user ID from Clerk.
We also log the user ID so it’s easy to find for testing.
To put this into our app, add the Notifications component to src/components/dashboard.tsx:
import {  RedirectToSignIn,  SignedIn,  SignedOut,  UserButton,} from '@clerk/clerk-react'; import { Notifications } from './notifications';
import styles from './dashboard.module.css';
export const Dashboard = () => {  return (    <>      <header className={styles.header}>        <a className={styles.homeLink} href="/" rel="home">          Toofshine        </a>
        <nav className={styles.nav}>          <SignedIn>             <Notifications />            <UserButton// ...unchanged below this point...
Save and look at your app dashboard. You’ll see the inbox at the top right and the user ID logged in the console.
Send a notification manually
To send a notification manually, copy the user ID and head to the Courier users page. (As always, make sure you’re still in test mode.) Create a new user — all you’ll need is the ID, which should match the ID from Clerk.
Save this, then click the “Home” option, then the “send a message” button on the home page.
You’ll see a form. On the right-hand side of the screen, choose “Push” from the channel dropdown, then Courier from the provider dropdown.
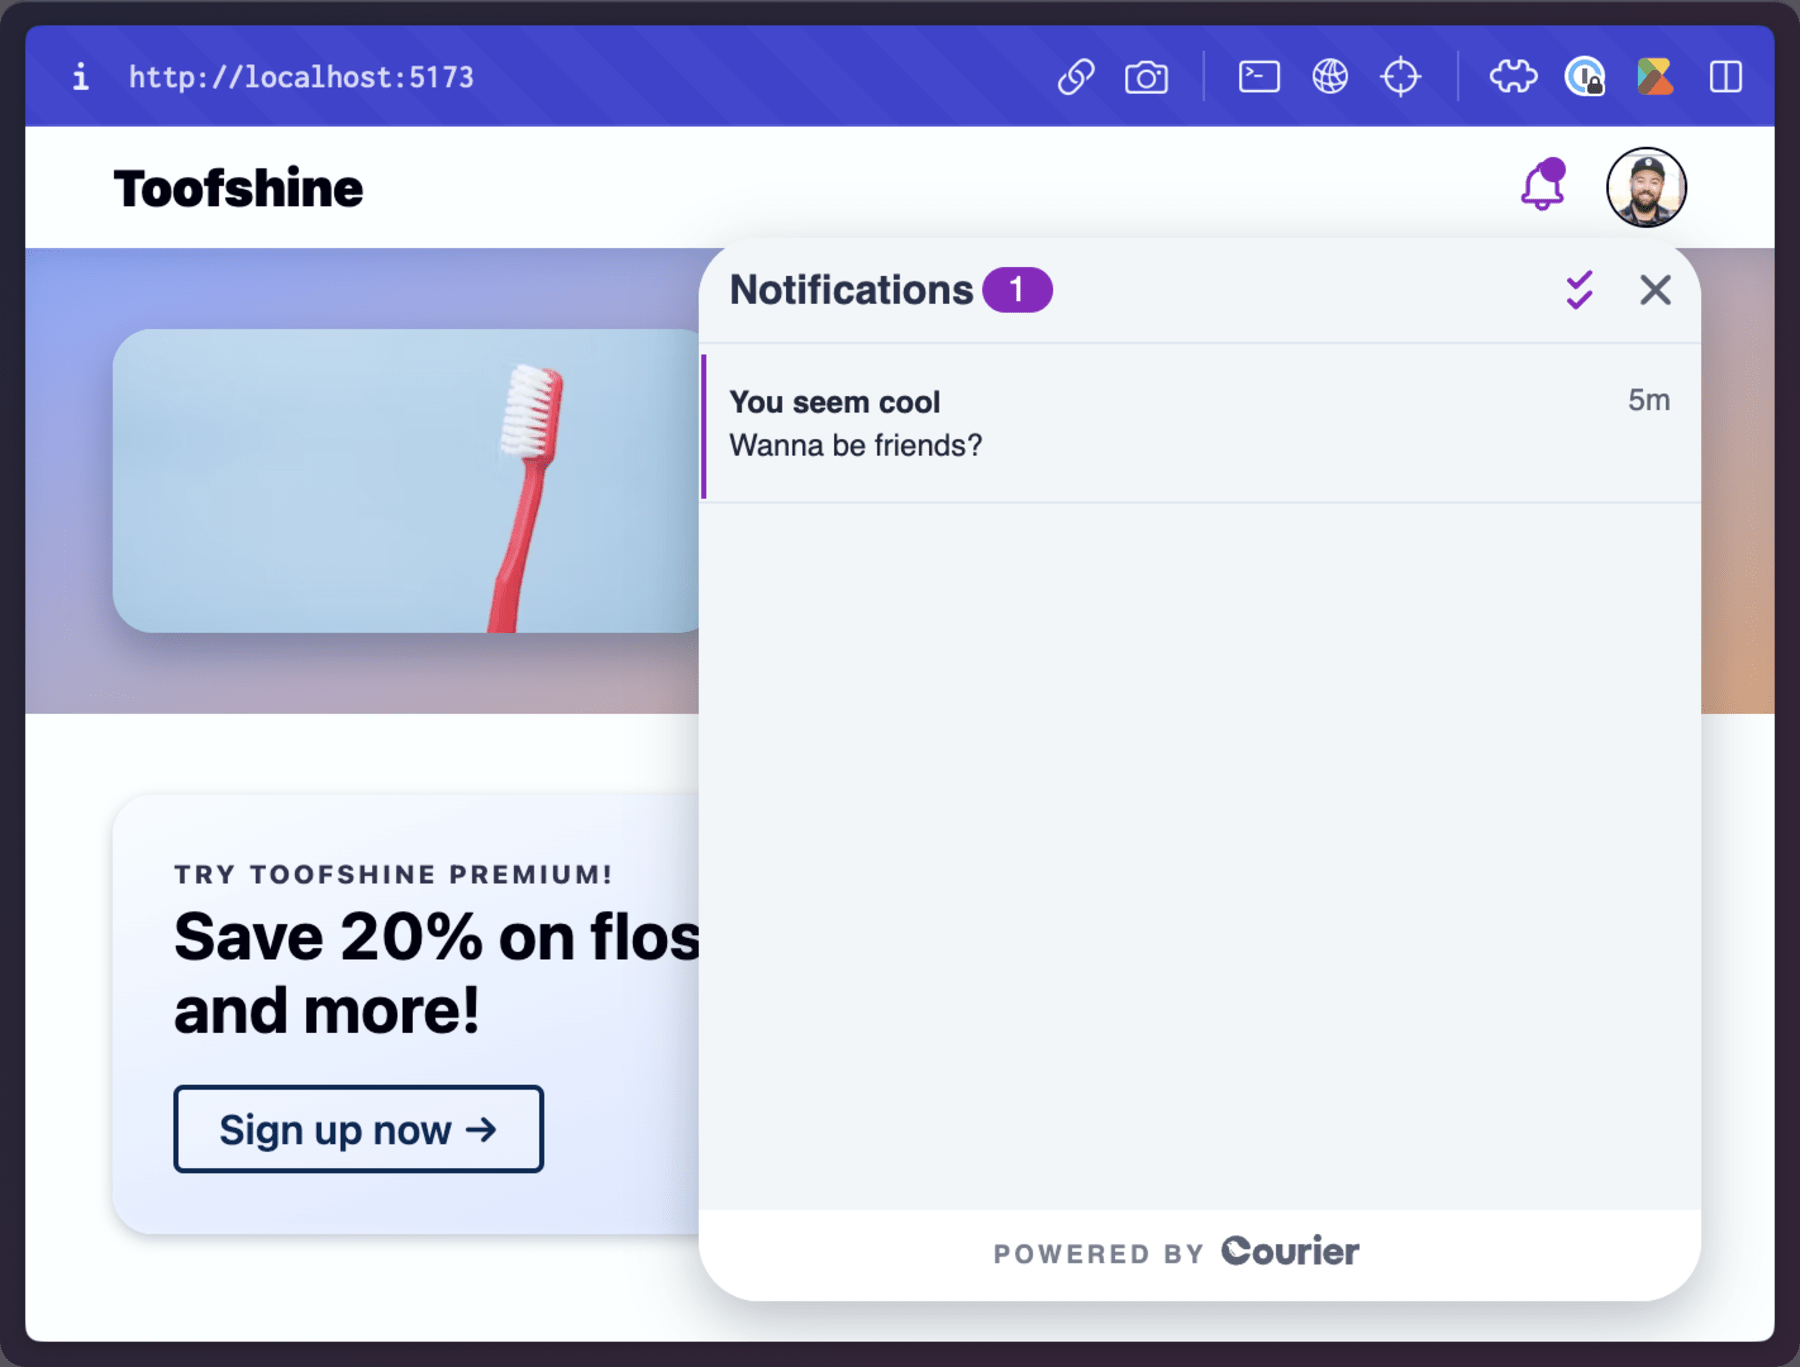
In the “To” field, add the same user ID, then click “send now”.

Back in the app, you’ll see a new notification in the inbox.
Automatically sync users to Courier
To make it possible to send notifications without manually creating each user, you’ll need a way to sync users from your user management tool into Courier. In Clerk, this can be done using a webhook that will be called whenever a user is created, updated, or deleted.
Get a Courier API key
To set this up, go to your Courier API keys page and copy the key with “Published” scope. Set it as the value of COURIER_API_KEY in .env.
Configure Clerk with a webhook and get the signing secret
Next, head to your Clerk dashboard, choose your app, and click the “Webhooks” option in the left-hand nav.
Inside, set any URL to start (we’ll change this in a later step) and check the “user” box so the webhook is called for all user events.

On the next screen, look for the “Signing Secret” toward the bottom of the right-hand column. Copy that value and set it as CLERK_WEBHOOK_SECRET.
Set up a live URL for testing local dev with Netlify Dev
To make debugging easier, we’ll be using Netlify Dev, which will set up a live tunnel and allow us to create a public URL that can access our local code while we’re developing. This is extremely helpful for debugging things like webhooks because it removes the need to deploy every change to see if it works.
In your terminal, install the Netlify CLI if you don’t have it, make sure you’re logged in, and then create a new project.
# if you don't already have it, install the Netlify CLI globallynpm i -g netlify-cli
# make sure you're logged inntl login
# create a new projectntl init
You can keep the defaults during initialization.
Once the project is hooked up to Netlify, run Netlify Dev with the --live flag to get a public URL:
ntl dev --live devThis will create a live URL that looks like https://dev--<your_site_name>.netlify.live.
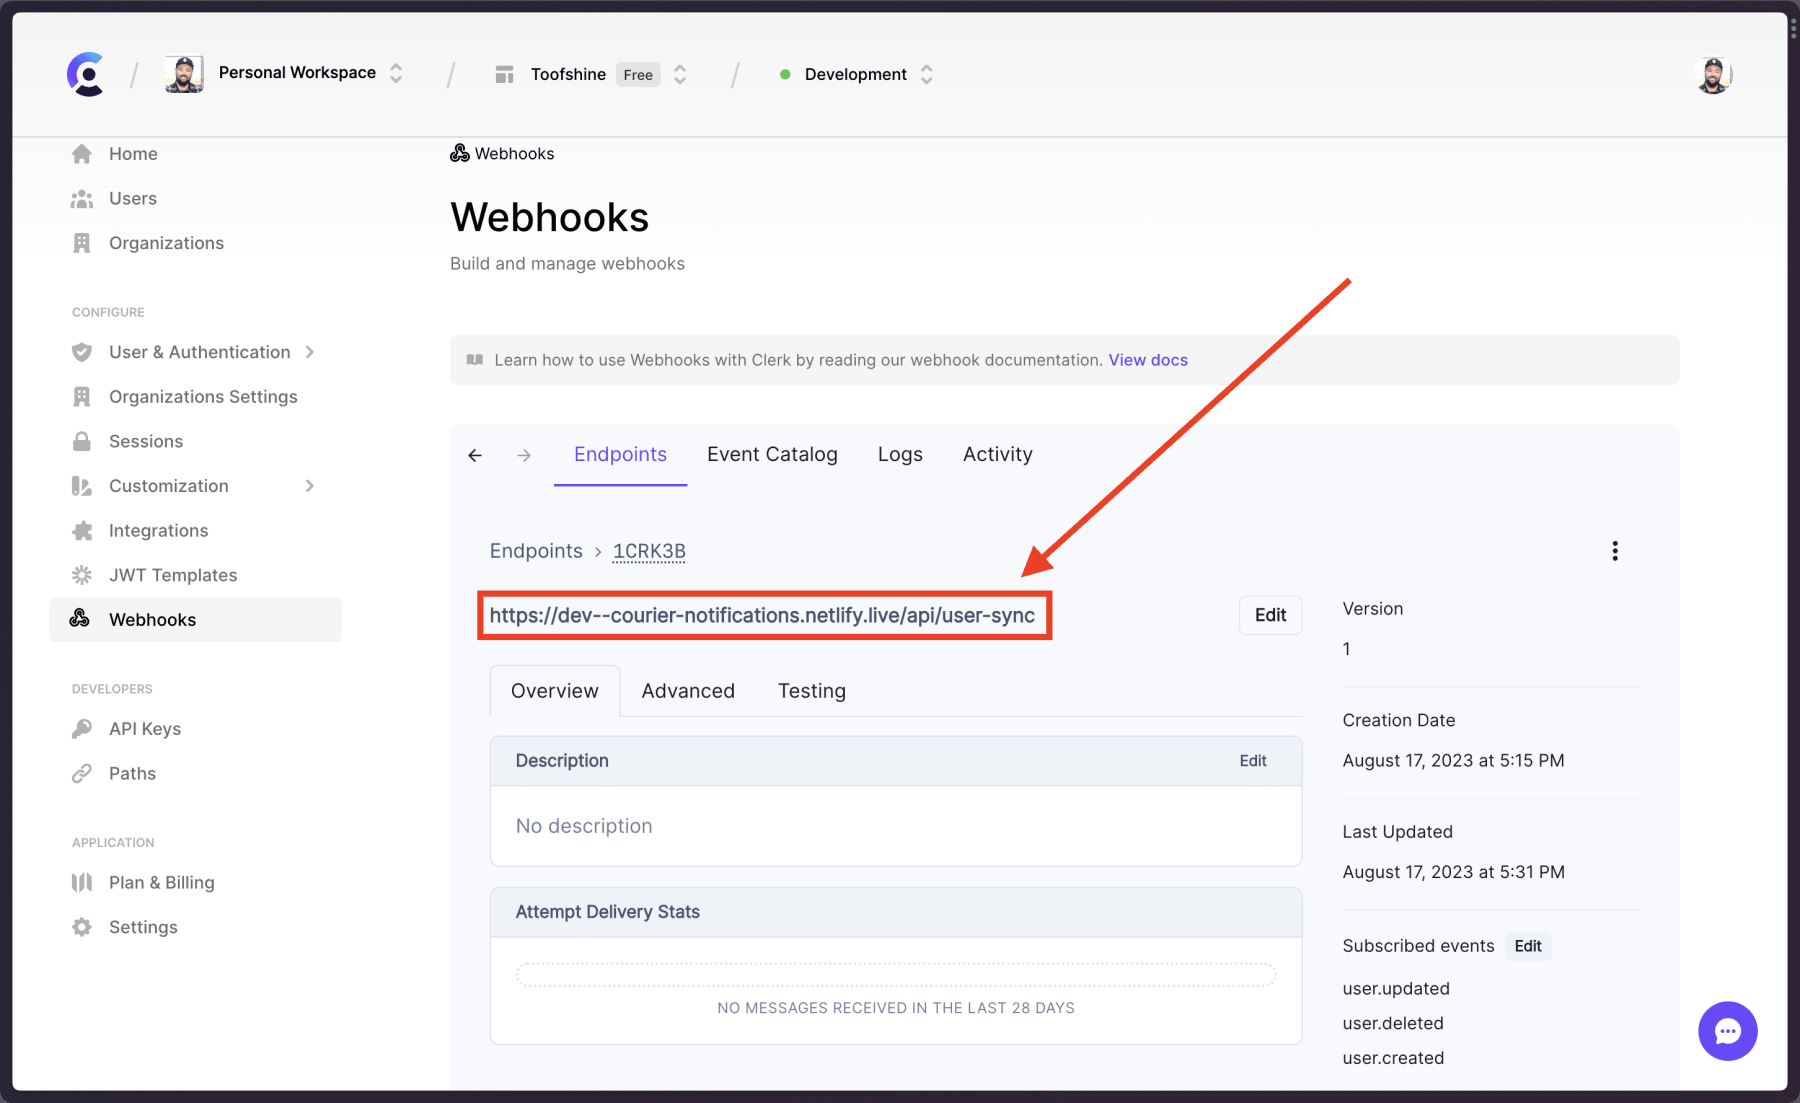
Back in the Clerk webhook configuration, edit the webhook URL to be your live dev URL from Netlify and add the path /api/user-sync to the end. We’ll build this endpoint in the next step.
Build the user sync webhook
Open netlify/functions/user-sync.ts in your code and replace the contents with the following:
import type { Handler } from '@netlify/functions';import type { WebhookEvent } from '@clerk/clerk-sdk-node';import { Webhook } from 'svix';import { CourierClient } from '@trycourier/courier';
const courier = CourierClient({  authorizationToken: process.env.COURIER_API_KEY,});
type ProfileData = {  email?: string;  phone_number?: string;};
function validateWebhook(req) {  try {    const wh = new Webhook(process.env.CLERK_WEBHOOK_SECRET!);    wh.verify(req.body ?? '', req.headers as any);    return true;  } catch (err) {    console.log(err);    return false;  }}
function getProfileDetails({ email_addresses, phone_numbers }): ProfileData {  const profile: ProfileData = {};
  if (email_addresses.length > 0 && email_addresses[0].email_address) {    profile.email = email_addresses[0].email_address;  }
  if (phone_numbers.length > 0 && phone_numbers[0].phone_number) {    profile.phone_number = phone_numbers[0].phone_number;  }
  return profile;}
export const handler: Handler = async (req) => {  if (!validateWebhook(req)) {    return {      statusCode: 400,      body: 'Bad Request',    };  }
  const event = JSON.parse(req.body ?? '') as WebhookEvent;
  switch (event.type) {    case 'user.created':    case 'user.updated':      await courier.replaceProfile({        recipientId: event.data.id,        profile: getProfileDetails(event.data),      });      break;
    case 'user.deleted':      if (!event.data.id) {        break;      }
      await courier.deleteProfile({        recipientId: event.data.id,      });      break;
    default:      return {        statusCode: 400,        body: 'Bad Request',      };  }
  return {    statusCode: 200,    body: 'OK',  };};
At the top, we create a new instance of the Courier Node SDK with our API key. This provides methods for us to handle all the Courier-related tasks we need to accomplish.
Next we define a couple helper functions:
validateWebhookuses the signing secret from Clerk to ensure that the webhook is legitimate to prevent someone from impersonating Clerk and messing with user datagetProfileDetailspulls the primary email address and phone number out of the Clerk user data and drops everything else since Courier won’t need it
In the actual exported handler, the incoming request is validated, and then we set up a switch on the event type.
- When a user is created or updated, we want to sync their user ID, phone number, and email to Courier to make sure they’re getting notifications properly
- When a user is deleted, we want to remove them from Courier entirely
Finally, we return a 200 status to let Clerk know the webhook was processed successfully.
To test this, Clerk has a “Testing” tab in the webhook config. Choose “user.created” from the dropdown and then click “Send Example”. You’ll see a successful call in the dev console, and the Courier users page will update with the example user.
Now, whenever a user is created, updated, or deleted, the necessary information required by Courier to send notifications will be automatically synced to Courier.
Create a custom audience in Courier
Sending notifications to individual users can be done using their IDs, but what if you want to send a notification to every active user — for instance, when a new feature launches?
In the Courier users page, click the ”+ Audience” button, name the audience “Active Members”, and save. The ID will automatically generate as active-members.
Inside, click “+Add Condition” and choose email, then scroll down to “exists” and choose “True”.
Next, click the ”+” at the end of email and choose phone_number, then set “exists” to “True”.
Use the “Calculate Audience” button to see the users that will be targeted. This should include your user ID from Clerk.

Now you’re able to send a notification to everyone in this audience, which greatly simplifies the process of sending notifications.
Send a notification using the Courier Node SDK
Now that users are properly synced and our notification channels are configured, let’s take a look at how the Courier Node SDK allows you to send notifications.
Open netlify/functions/send-notification.ts and replace the contents with the following:
import type { Handler } from '@netlify/functions';import { CourierClient } from '@trycourier/courier';
const courier = CourierClient({  authorizationToken: process.env.COURIER_API_KEY,});
export const handler: Handler = async (req) => {  const { title, body } = JSON.parse(req.body ?? '');
  if (req.httpMethod !== 'POST' || !title || !body) {    return {      statusCode: 400,      body: 'Bad Request',    };  }
  const res = await courier.send({    message: {      to: {        audience_id: 'active-members',      },      content: {        title,        body,      },    },  });
  return {    statusCode: 200,    body: JSON.stringify(res),  };};
This is a Netlify Function that sets up the Courier Node SDK, pulls the title and body out of the POST request, and then uses the send method of the SDK to deliver the notification to everyone in the active-members audience.
It then returns a 200 to let you know the function ran successfully.
With your Netlify Dev process still running, use a tool like Postman or a cURL command to send a POST request to the /api/send-notification endpoint of your live URL.
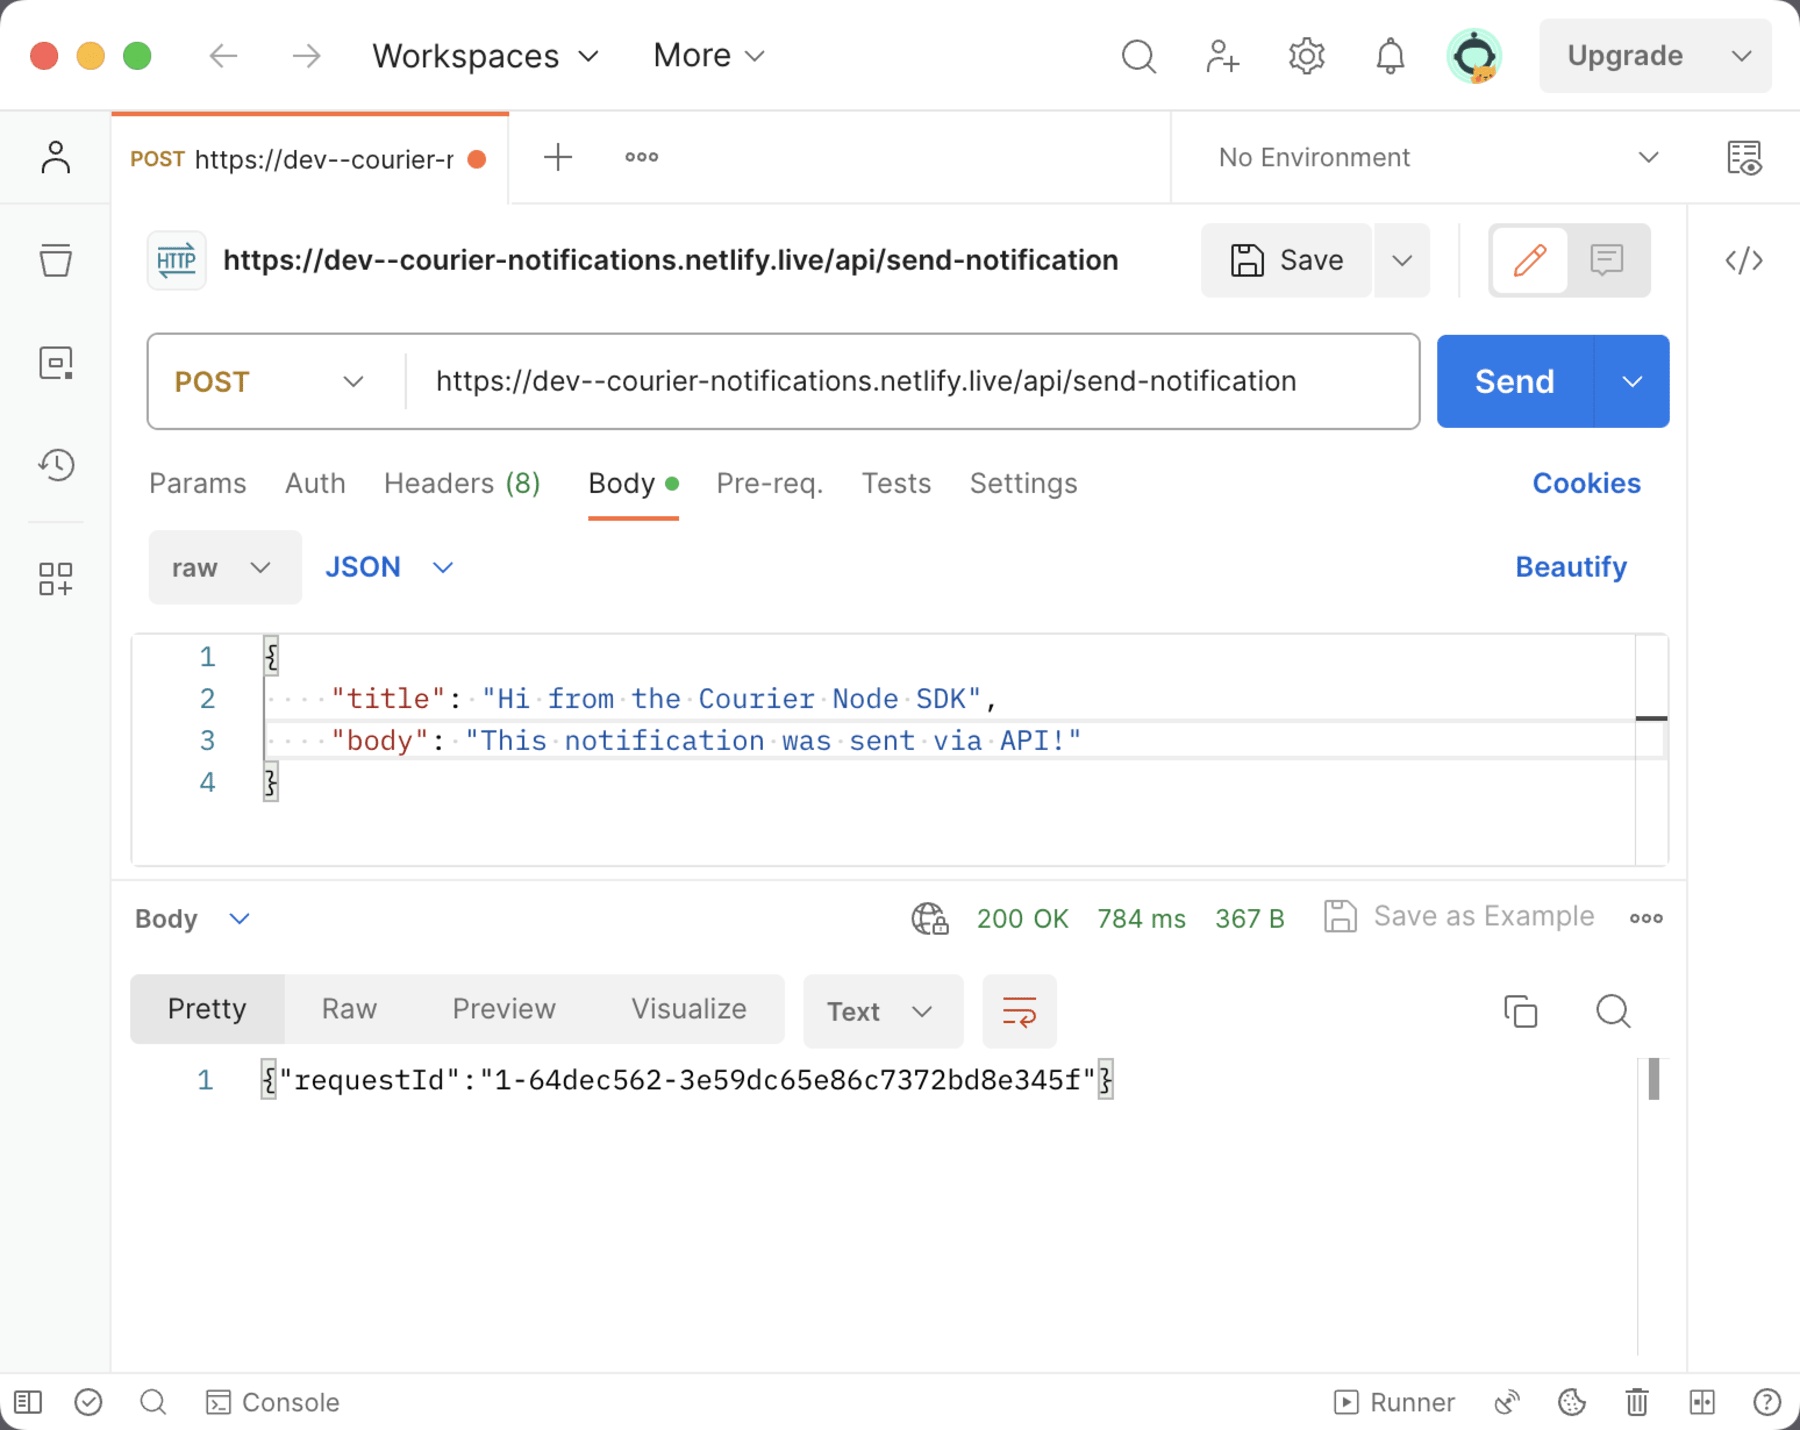
The notification will show up in your in-app inbox.

If you look at the Courier logs, you’ll see that the notification was sent to the inbox and also to the best of either SMS or email. If you registered using GitHub, it’s likely that you only have an email on your account, so you’ll get an email from Clerk with your notification.

If you update Clerk to use phone numbers for registration and create a new account, sending notifications will now hit the inbox and SMS for that user.
Notifications don’t have to be hard or annoying
Courier has made it possible to get notifications running within an app in a few minutes and without much additional code at all, all while making it less complicated to send notifications in a way that won’t overwhelm or annoy your app’s users.
Thanks again to Courier for making this tutorial possible.
Go build something cool (with notifications)!